
After talking about Cermark from Thermark (now Ferro) in laser classes for two years, I finally got around to trying it. I sprayed a light coat of Cermark LMM-6000 from an aerosol can onto a few small galvanized steel plates (Strong-Tie TP35 from Home Depot) I had left over from another project. After it dried, I engraved using the laser at various settings, both raster and vector, and then washed off the rest of the spray with water.
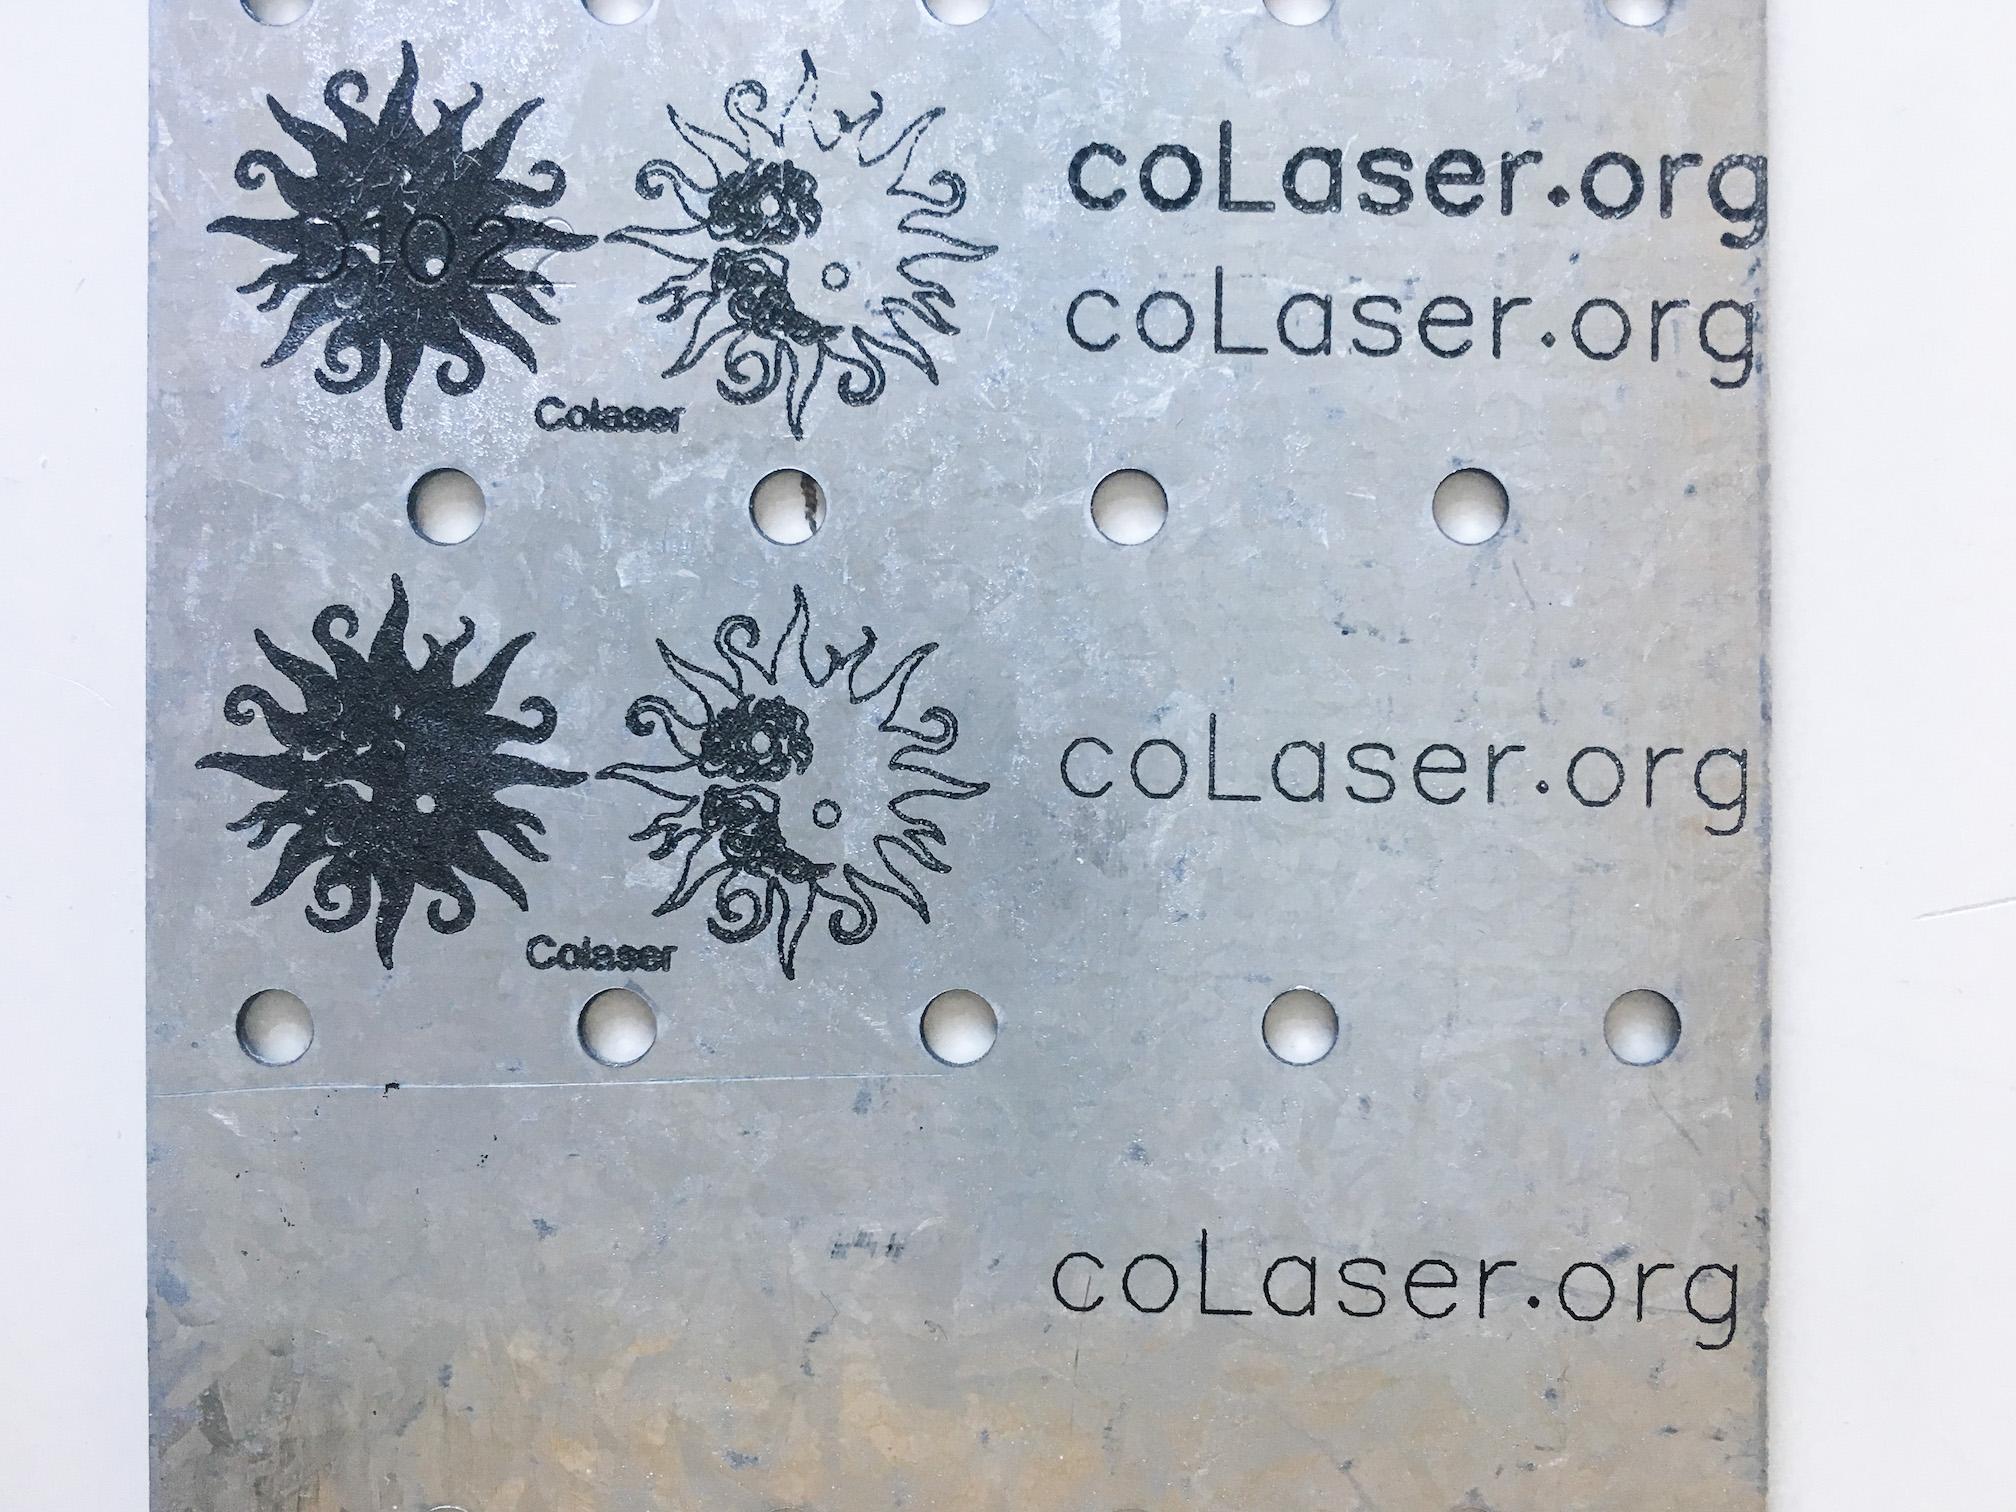
Initial test of Cermark LMM-6000 on galvanized steel plate
The sun images are about 0.75 inches in diameter; the whole plate is 3.25 inches wide. The top raster image of a filled sun, a lines-only sun, and the word “Colaser” was engraved at 100% speed and 100% power. Some of the fine detail in the cutouts is filled in, so that setting is too high. The lower raster image was engraved at 50% power, and it looks pretty good. A third raster test was done at 10% power, and it made no mark on the metal at all.
The vector test image was the text “coLaser.org”. The topmost one was done with the wrong art, so each stroke was double-cut or worse. Disregard that one. The test right below it was cut as single lines at vector settings of 100% speed and 100% power. The middle test was done at 20% power, and the bottom test was done at 5% power. All three tests look pretty good. The resulting line is just a little bit narrower at the lower power settings. Even lower power settings would be worth experimenting with.
You can see some dropouts near the top of the top sun image. I think that’s due to inadequate spray coverage. The instructions say to make a thin coating that just covers the metal. I may have been a little stingy with the spray.
The photography was a bit challenging. Depending on lighting, the mark can be nearly invisible in photos. In person, though, it looks like black on top of the metal.
The marking seems to be quite durable. It’s a bit rough to the touch, and if it were ordinary paint it would rub off easily. As a test, I tried to scrape it off with my thumbnail. That worked like a nail file: the Cermark ground down my thumbnail and took no damage. An Xacto knife was able to scrape it off. In between, scraping at it with a piece of copper was more or less a draw: some Cermark was removed, but some copper was left behind too.
There was no visible smoke or ash from the engraving, so I suppose this material is completely safe for the laser. The engraved image is visible before washing, but the appearance is not a good guide to laser power settings. The third row of raster tests looked black before washing, but did not stick to the metal. (I was in a hurry and neglected to take any photographs before washing.)
Thermark has recommended settings for this material for 30 watt and 45 watt CO2 lasers. They talk about speed in inches per second, and I don’t know offhand how that translates to the percentage speed settings we use on Retina Engrave 3D. For the 30W laser, they recommend maximum power for most materials, but on the 45W laser they suggest using lower settings for some materials. On galvanized steel, they still suggest full power at 45 watts. They don’t give any suggestions for 150W lasers like ours.
Also, note that the laser may not have been working at full power the day I ran this test. During the class later that day, the laser power was dropping significantly (for reasons yet to be determined). In any case, you’ll need to run tests with your material to determine the best settings for Cermark.
We also have a spray can of Cermark LMM-6044, which is for glass and tile. I still have yet to try that.