
Last night Martin reported that he was cutting some thin plywood when the laser suddenly stopped, manifesting a complete loss of power. Power at the outlet was still good, and the visible circuit breaker on the back of the machine had not tripped. It behaved, Martin suggested, as if an internal fuse or circuit breaker had blown.
Today I took a look at it, and confirmed Martin’s report. I don’t have a schematic diagram or any documentation on the electronics of the laser. The components are more or less accessible through the side doors and are mostly wired up with individual wires, so it is possible with some patience to trace the wiring. The power wiring is very carefully insulated, terminated, and glued in place, though, so it isn’t so easy to probe the circuits.
The power comes in from the wall through a standard IEC cable and matching chassis connector, like a desktop computer. Then it goes through a device labeled in Chinese that appears to be a relative of a ground fault circuit interrupter, or GFCI, like you see on outlets in wet areas, plus a circuit breaker. Then it disappears into a wiring trough, to reappear at the front panel. One wire goes through the big red E-stop switch, and the other wire goes through the key switch, and then they both go back into the wiring trough. They come out again in the side cabinet, and go through an EMI filter before being distributed to the various DC power supplies. The connections to the EMI filter are push-on tabs, so they can be backed off a bit and probed. There was no voltage there, with power connected and the switches all on.
OK, so it’s all wires and switches, except for the GFCI. Now I’ve known GFCIs to fail, so I suspected it. I just needed confirmation that power was present at the input to the GFCI, and absent at the output. Lacking any really good way to probe this, I tried poking the sharp ends of the voltmeter’s probes through the soft insulation on the wires. I saw no voltage on the input, so I suspected the probing technique was not working.
To check on the probing technique, I switched the meter to ohms and tried to look at connectivity between the IEC connector and the inputs to the GFCI. I couldn’t find any connection there, either. Maybe that just wasn’t an effective way to probe the wires.
Along about this time, I happened to take a closer look at the IEC connector and noticed that it had an integral fuse. Aha! I bet that fuse was blown. So I pulled out the fuse holder. I was impressed to see that the fuse holder also contained a spare fuse. Nice touch. But when I measured the installed fuse, it was good. In fact it measured almost exactly the same as the spare fuse.
Now I was ready to doubt every connection. I probed around everywhere, not trusting anything. And I found something unexpected. There was no connection between the hot pin on the IEC connector and the fuse. Mind you, these are all part of the same piece, since the fuse holder is integral to the IEC connector.
The photo here shows the back side of the IEC connector/fuse holder, and you can see the common chassis ground post just below it.
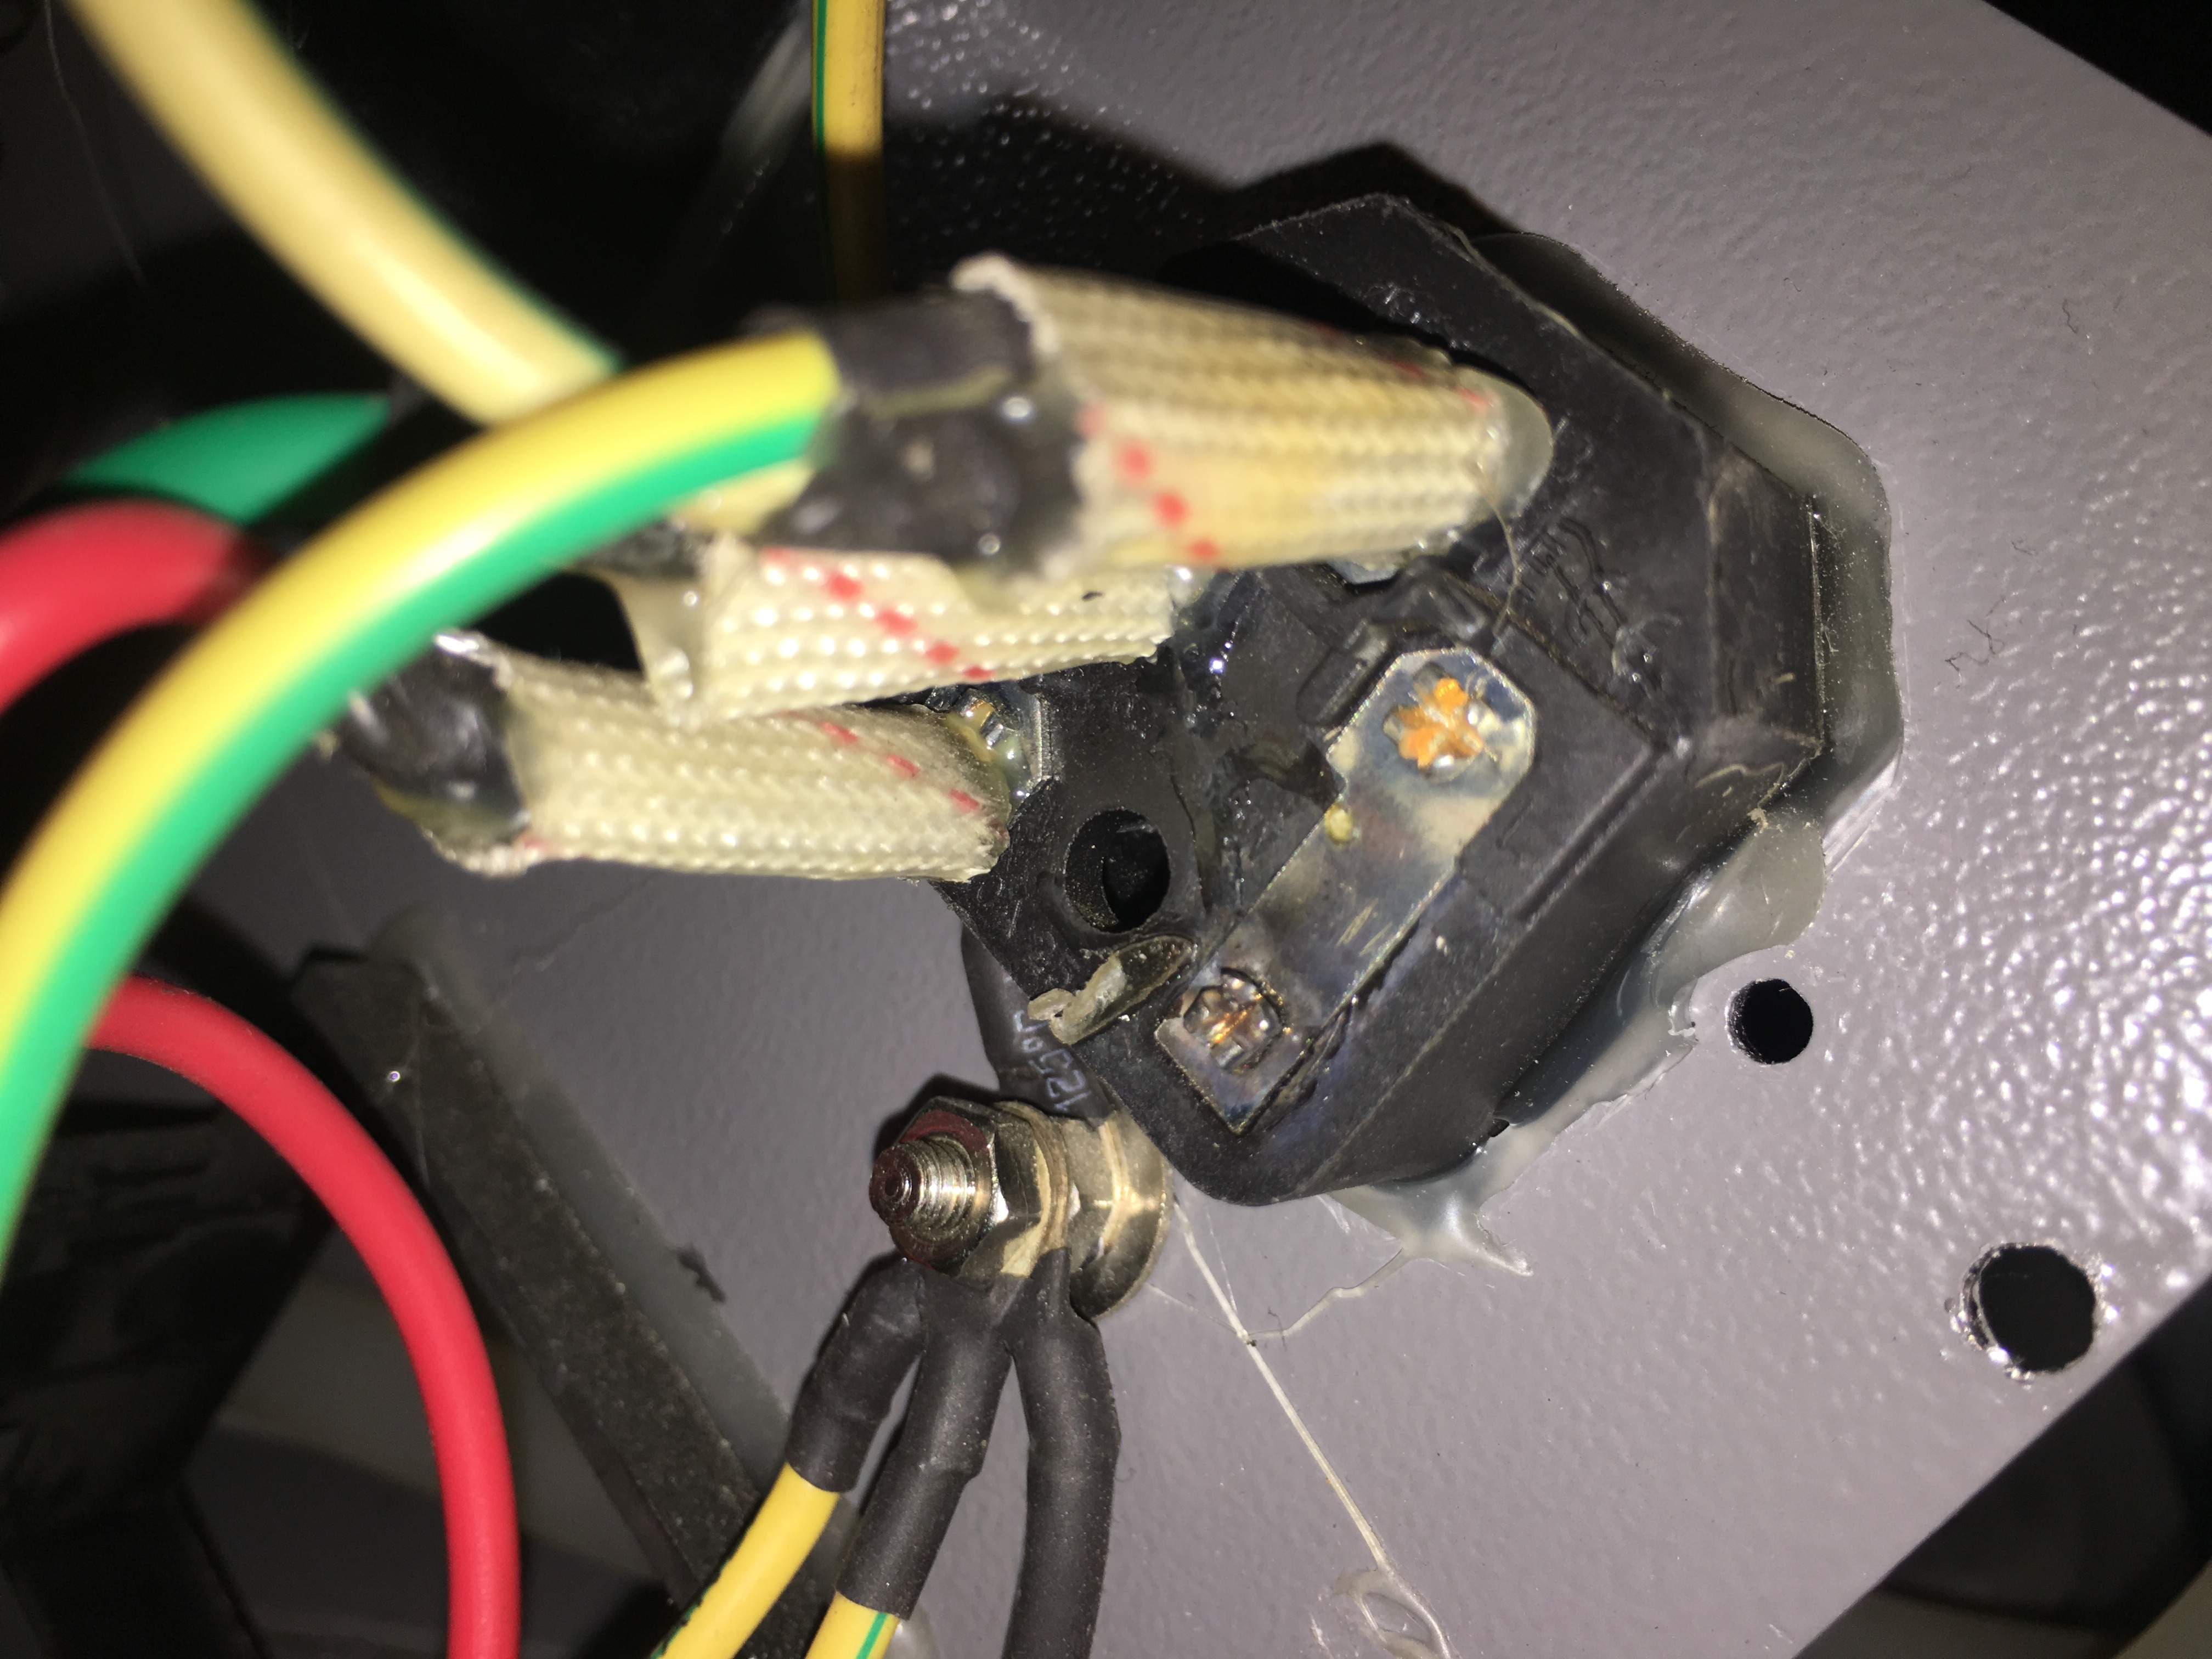
On the right side, you can see a metal strap with two studs sticking through it. The upper stud (the nice shiny golden one) is the hot pin of the IEC connector, and it makes a very solid connection to the strap. The lower stud (the blackened one) is one contact of the fuse holder. It looks connected at first glance, but it isn’t. There’s a tiny annular gap around the stud, and it doesn’t touch the strap at all. It must have touched, until yesterday evening, but it must have been marginally bad from the beginning. I suspect it got worse very slowly, until it reached a point of thermal runaway and burned out suddenly.
I didn’t think I’d be able to source a replacement connector locally on a Saturday afternoon, so instead Robert donated the purchase of a soldering gun and a wire brush from our neighbor Home Depot, and I blobbed some solder between the stud and the strap. Problem solved!
That connector would have been at the very bottom of my list of suspected components.