Happy anniversary to Colaser! It cuts its first job three years ago today.
Colaser Turns 3
Reply

Happy anniversary to Colaser! It cuts its first job three years ago today.
On June 23, I had to remove the beam combiner that routes the red dot spotting laser through the same optics as the cutting laser, because the cumulative damage had pretty much destroyed it. Until the beam combiner is replaced, there will be no red dot to help you see where the laser will hit your material. I have ordered a new beam combiner, and a spare.
Update (August 4): In order to get a reasonable price on this specialized optical beam combiner, I ordered direct from a supplier in China. They quote a usual shipping time of 12-20 days. It has now been 41 days. Overdue, but I can’t open a dispute until 60 days have passed. If the slow boat doesn’t eventually arrive, I’ll have to re-order.
Until then, I hope you’re not having too much trouble using the laser without the red dot.
Today I went in to try and diagnose the problem with reduced power. Well, the problem is gone, but I didn’t do anything to fix it.
My hopeful theory was that the surge suppressors inside the high voltage power supply were starting to fail again. That’d be a cheap and easy repair. I opened up the high voltage power supply and found no visible damage to the surge suppressors, and they tested good with a multimeter (now in the toolbox for future use).
The power faded out during a class session, where we were running small jobs with longish pauses in between. It was a warm day, but far from the warmest we’ve had to deal with this year. Today I tried running several longish jobs at high power to stress the system, but couldn’t get it to misbehave.
Terry ran some quarter-inch acrylic cuts last night and also got normal performance (60 speed and 100 power to cut through).
So, I don’t know what was wrong, or whether it will be wrong again anytime soon.
Toward the end of class yesterday we noted that the laser output power wasn’t up to par. Material that can usually be cut at 20% power was requiring 70%. Alignment test pulses were weaker than usual, even before passing through any optics.
That leaves the laser tube itself and the electronics. I’m hoping this is the same problem we had before, which turned out to be failing surge suppressors inside the high voltage power supply. If so, that’s a cheap and easy fix. If not, we may have an expensive repair to do.
In the meantime, as far as I know it’s OK to use the laser by just cranking up the power settings (or reducing speed). Be aware, though, that it’s likely to get worse or fail entirely.
I tried to build a nice box out of laser cut parts, and found that rectangles weren’t coming out rectangular!
It was off by about 0.38 degrees, or 5/16 inch across the whole bed. That’s a lot! Or not, depending on what you’re trying to make.
I went back and measured some other things with square corners that have been cut on Colaser. Ones from about a year ago are square, but more recent ones are not. This problem has been happening for months.
At first glance, this kind of error seems impossible. The designs in question are perfect rectangles, and they are aligned with the machine’s axes, so nothing subtle like slippage in the stepper motors would account for it. The cut sides would have to be perfectly parallel to the Y rails that the gantry moves on and the top and bottom would have to be perfectly parallel to the X rail on the gantry. I think this means the gantry itself must be out of square with the side rails.
I failed to find anything on the internet about this problem on our exact model of laser, but I did find a case where a smaller model from the same company had the same symptom. That smaller model is very different mechanically, but the relevant part of the mechanism is similar. There’s a shaft connecting the left rail drive belt pulley to the right rail drive belt pulley, and a coupler in the shaft. If either half of the shaft slips in the coupler or in its respective belt drive pulley, two belts become misaligned, and so the gantry is no longer perpendicular to the Y axis. Yes, that’s right, another alignment adjustment that I knew nothing about.
With some help from Robert, whose reserved laser time I horned in on, I was able to get this readjusted. I chose to adjust it at the coupler, since I couldn’t be sure the pulleys weren’t fixed into a particular position on the shaft by flats ground into the shaft. I loaded up a big sheet of cardboard onto the bed, set the power very low, and engraved a long horizontal line and a long vertical line, to match my 16×24 inch carpenter’s square. I set the square carefully on the vertical (Y axis) line, and measured the deviation of the horizontal (X axis) line. Scaled to match the full width of the bed, that is the amount of correction needed on one belt or the other.
The easiest way to adjust the alignment is to leave the machine turned on, so that the stepper motor holds the left half of the shaft from rotating. Then loosen the set screws on that half of the coupler, turn the coupler the appropriate amount, and retighten the set screws. The stepper motor is not so strong that it can’t be shifted, so some care is needed to avoid applying too much force to the fixed half of the shaft. The whole procedure requires care, for that matter, since the coupler is under and behind the fragile, expensive glass laser tube.
The easiest way to keep track of how far the belt has moved is to use the red laser dot, with the head as close to the side being adjusted as possible. We marked the cardboard with the utility knife, which makes a finer mark than any pen or pencil we had handy. Then we offset the laser dot by the amount we calculated it needed to move. Then Robert watched the laser dot while I rotated the coupler until the dot was again on top of the mark. Having two people makes this procedure much easier.
It still took us six tries and two or three hours to get it right, since we had to invent the procedure. Another thing that makes it take a while is that Mirror 2 needs to be readjusted after every adjustment of the gantry alignment.
At one point we had the gantry pretty far out of alignment, with the right side of the gantry closer to the front of the machine. When we tried to home the machine in this state, it hit the mechanical stop on the left side before it hit the limit switch on the right side. That means it made a horrendous noise (either the belt repeatedly jumping a tooth or the stepper motor repeatedly slamming against the stop, I couldn’t tell which) until the homing procedure was aborted.
Just to be clear, I’m not suggesting that regular laser users should attempt this procedure, or really any of the alignment procedures. I’m just documenting it here for reference by me or future laser technicians, and for general interest. As a user of the laser, it’s useful for you to be aware of what sorts of things can go out of adjustment, so you can be on the lookout for them. Now we know that if you are cutting parts that need to fit together precisely, it might be a good idea to verify that the X and Y axes are really perpendicular before you commit a lot of time or material.
So, how did this happen? I don’t know. All the set screws were nice and tight. The only thing I can figure is that somebody crashed the head hard in the Y axis and something slipped, despite being tight. If you do have a head crash, please let me know so I can check for alignment issues.
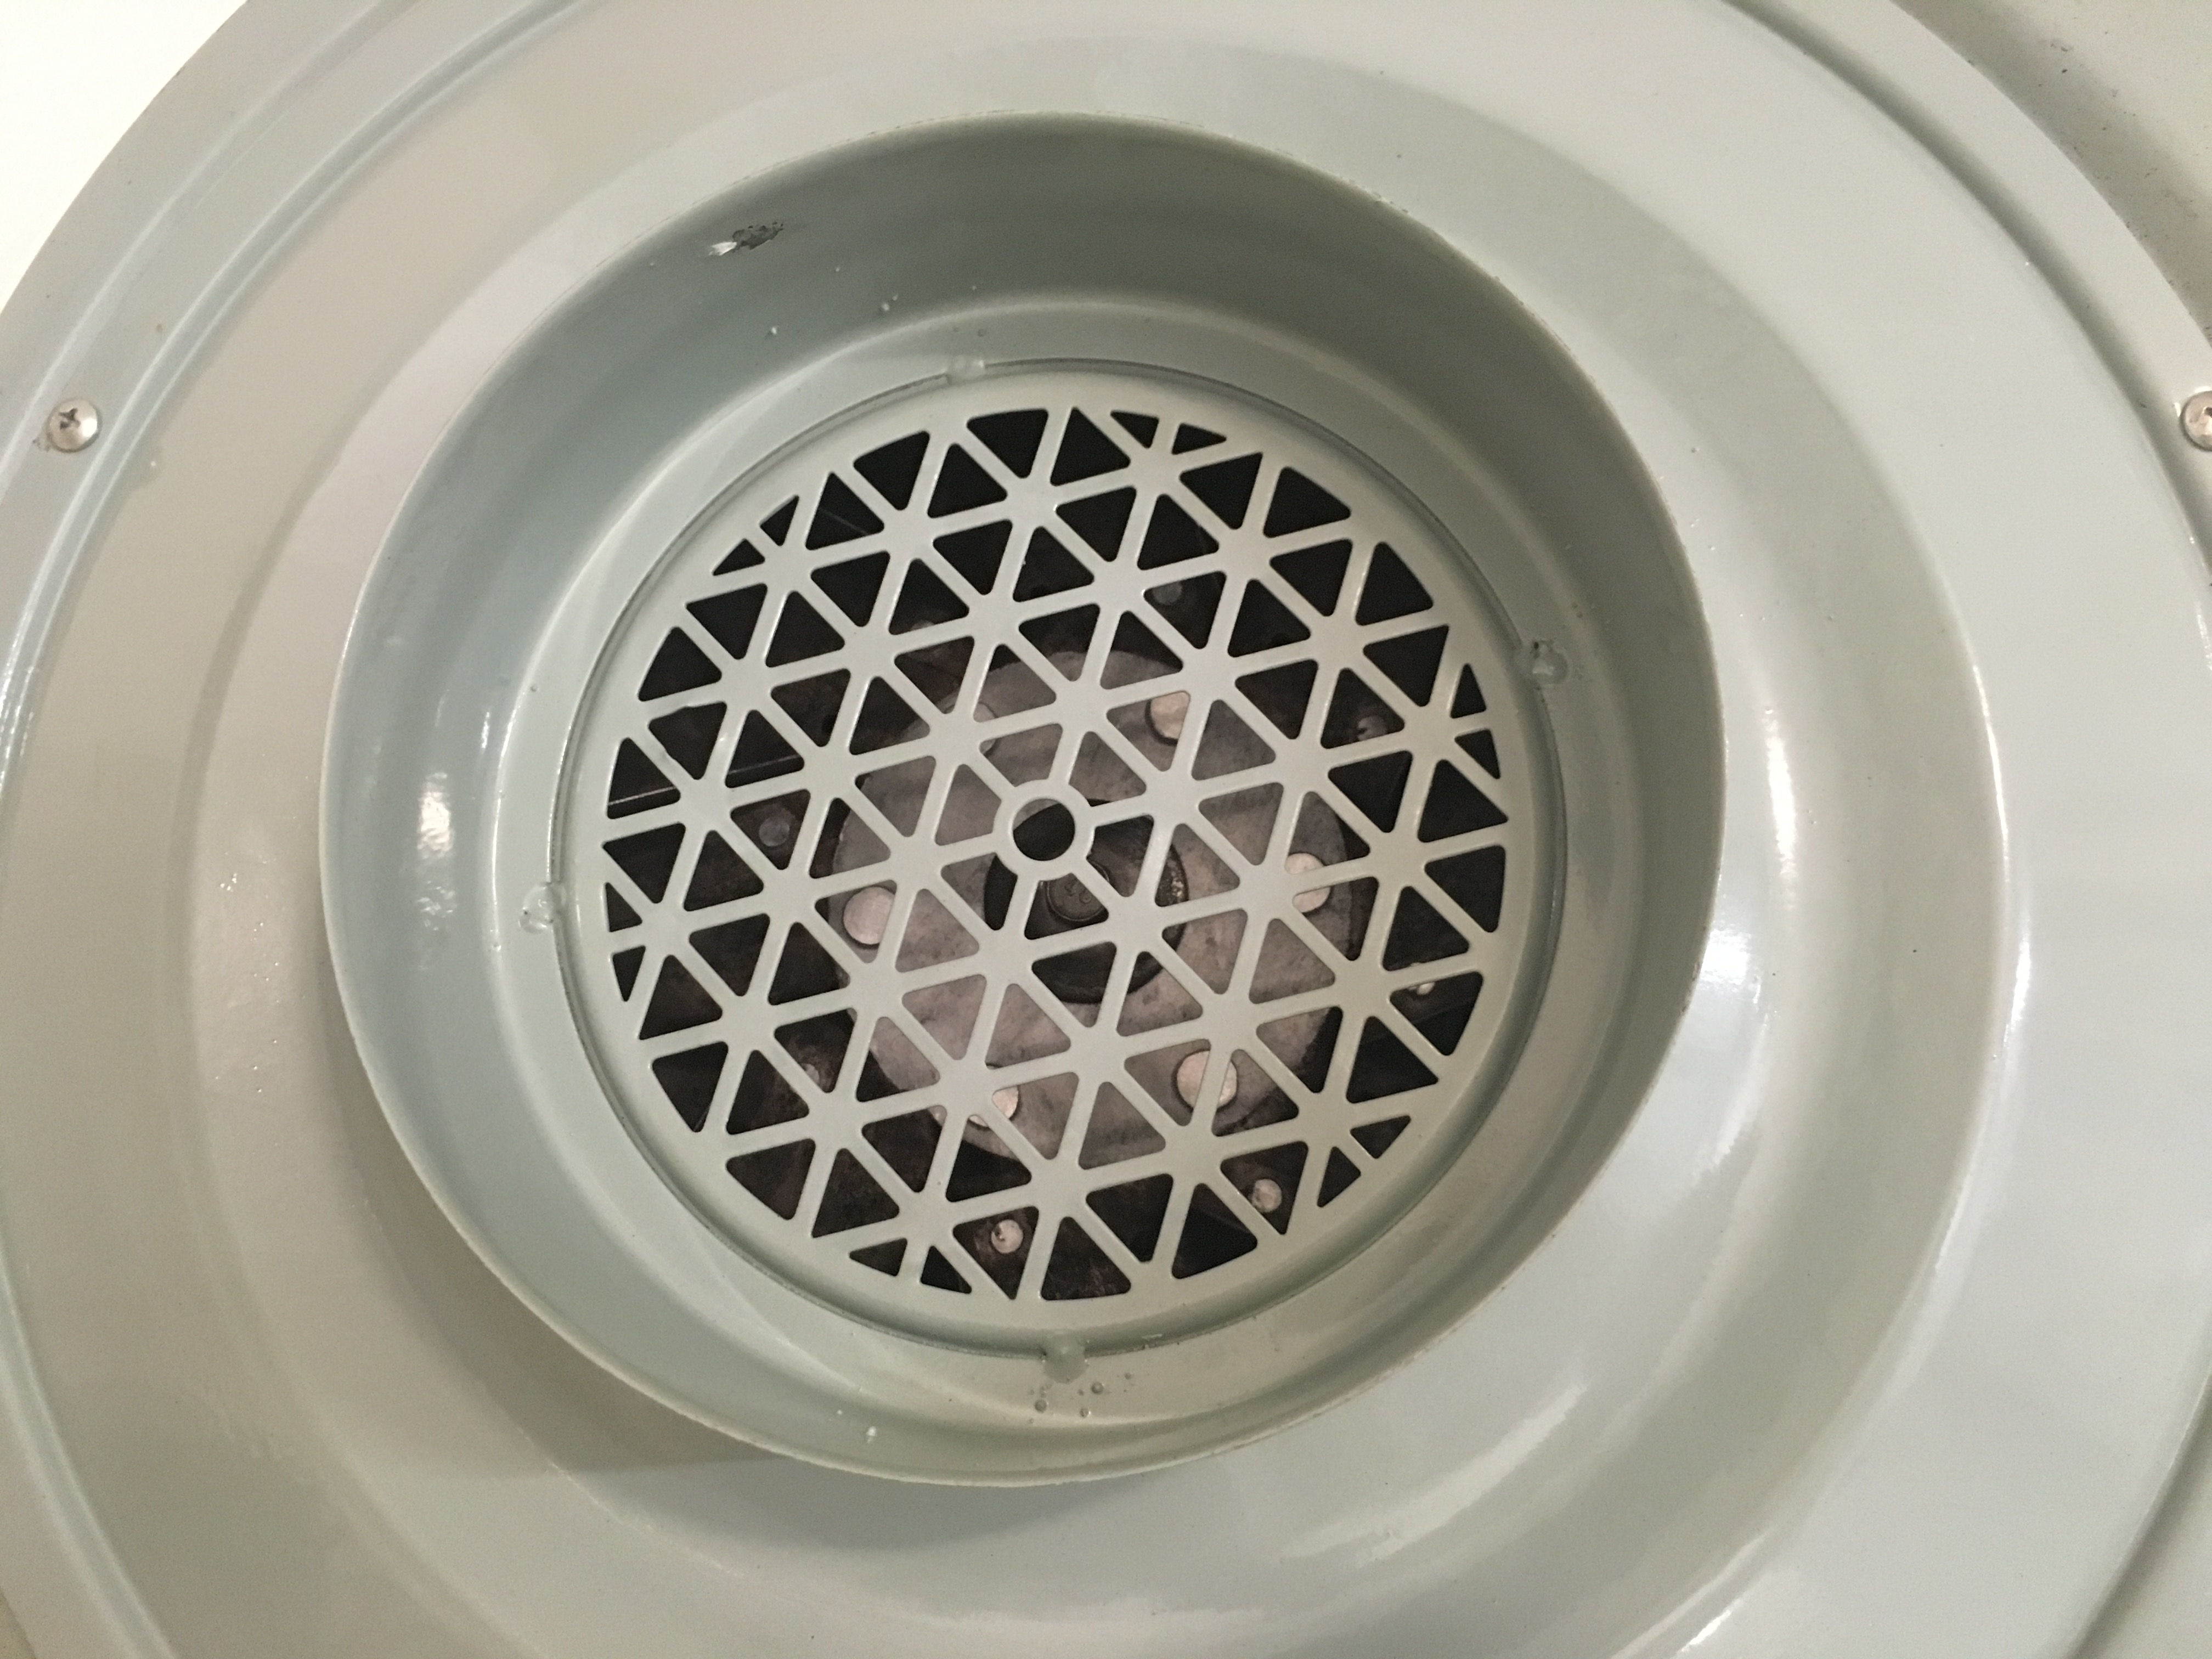
The roof-mounted exhaust fan that pulls the smoke out of the laser chamber has been getting weaker recently. A cursory inspection revealed no problems with the ducting, and power getting to the blower, so the blower itself was to blame.
I procured a new, more powerful blower and Natural installed it on the roof on August 27. The new blower exhausts smoke more quickly than the old one ever did.
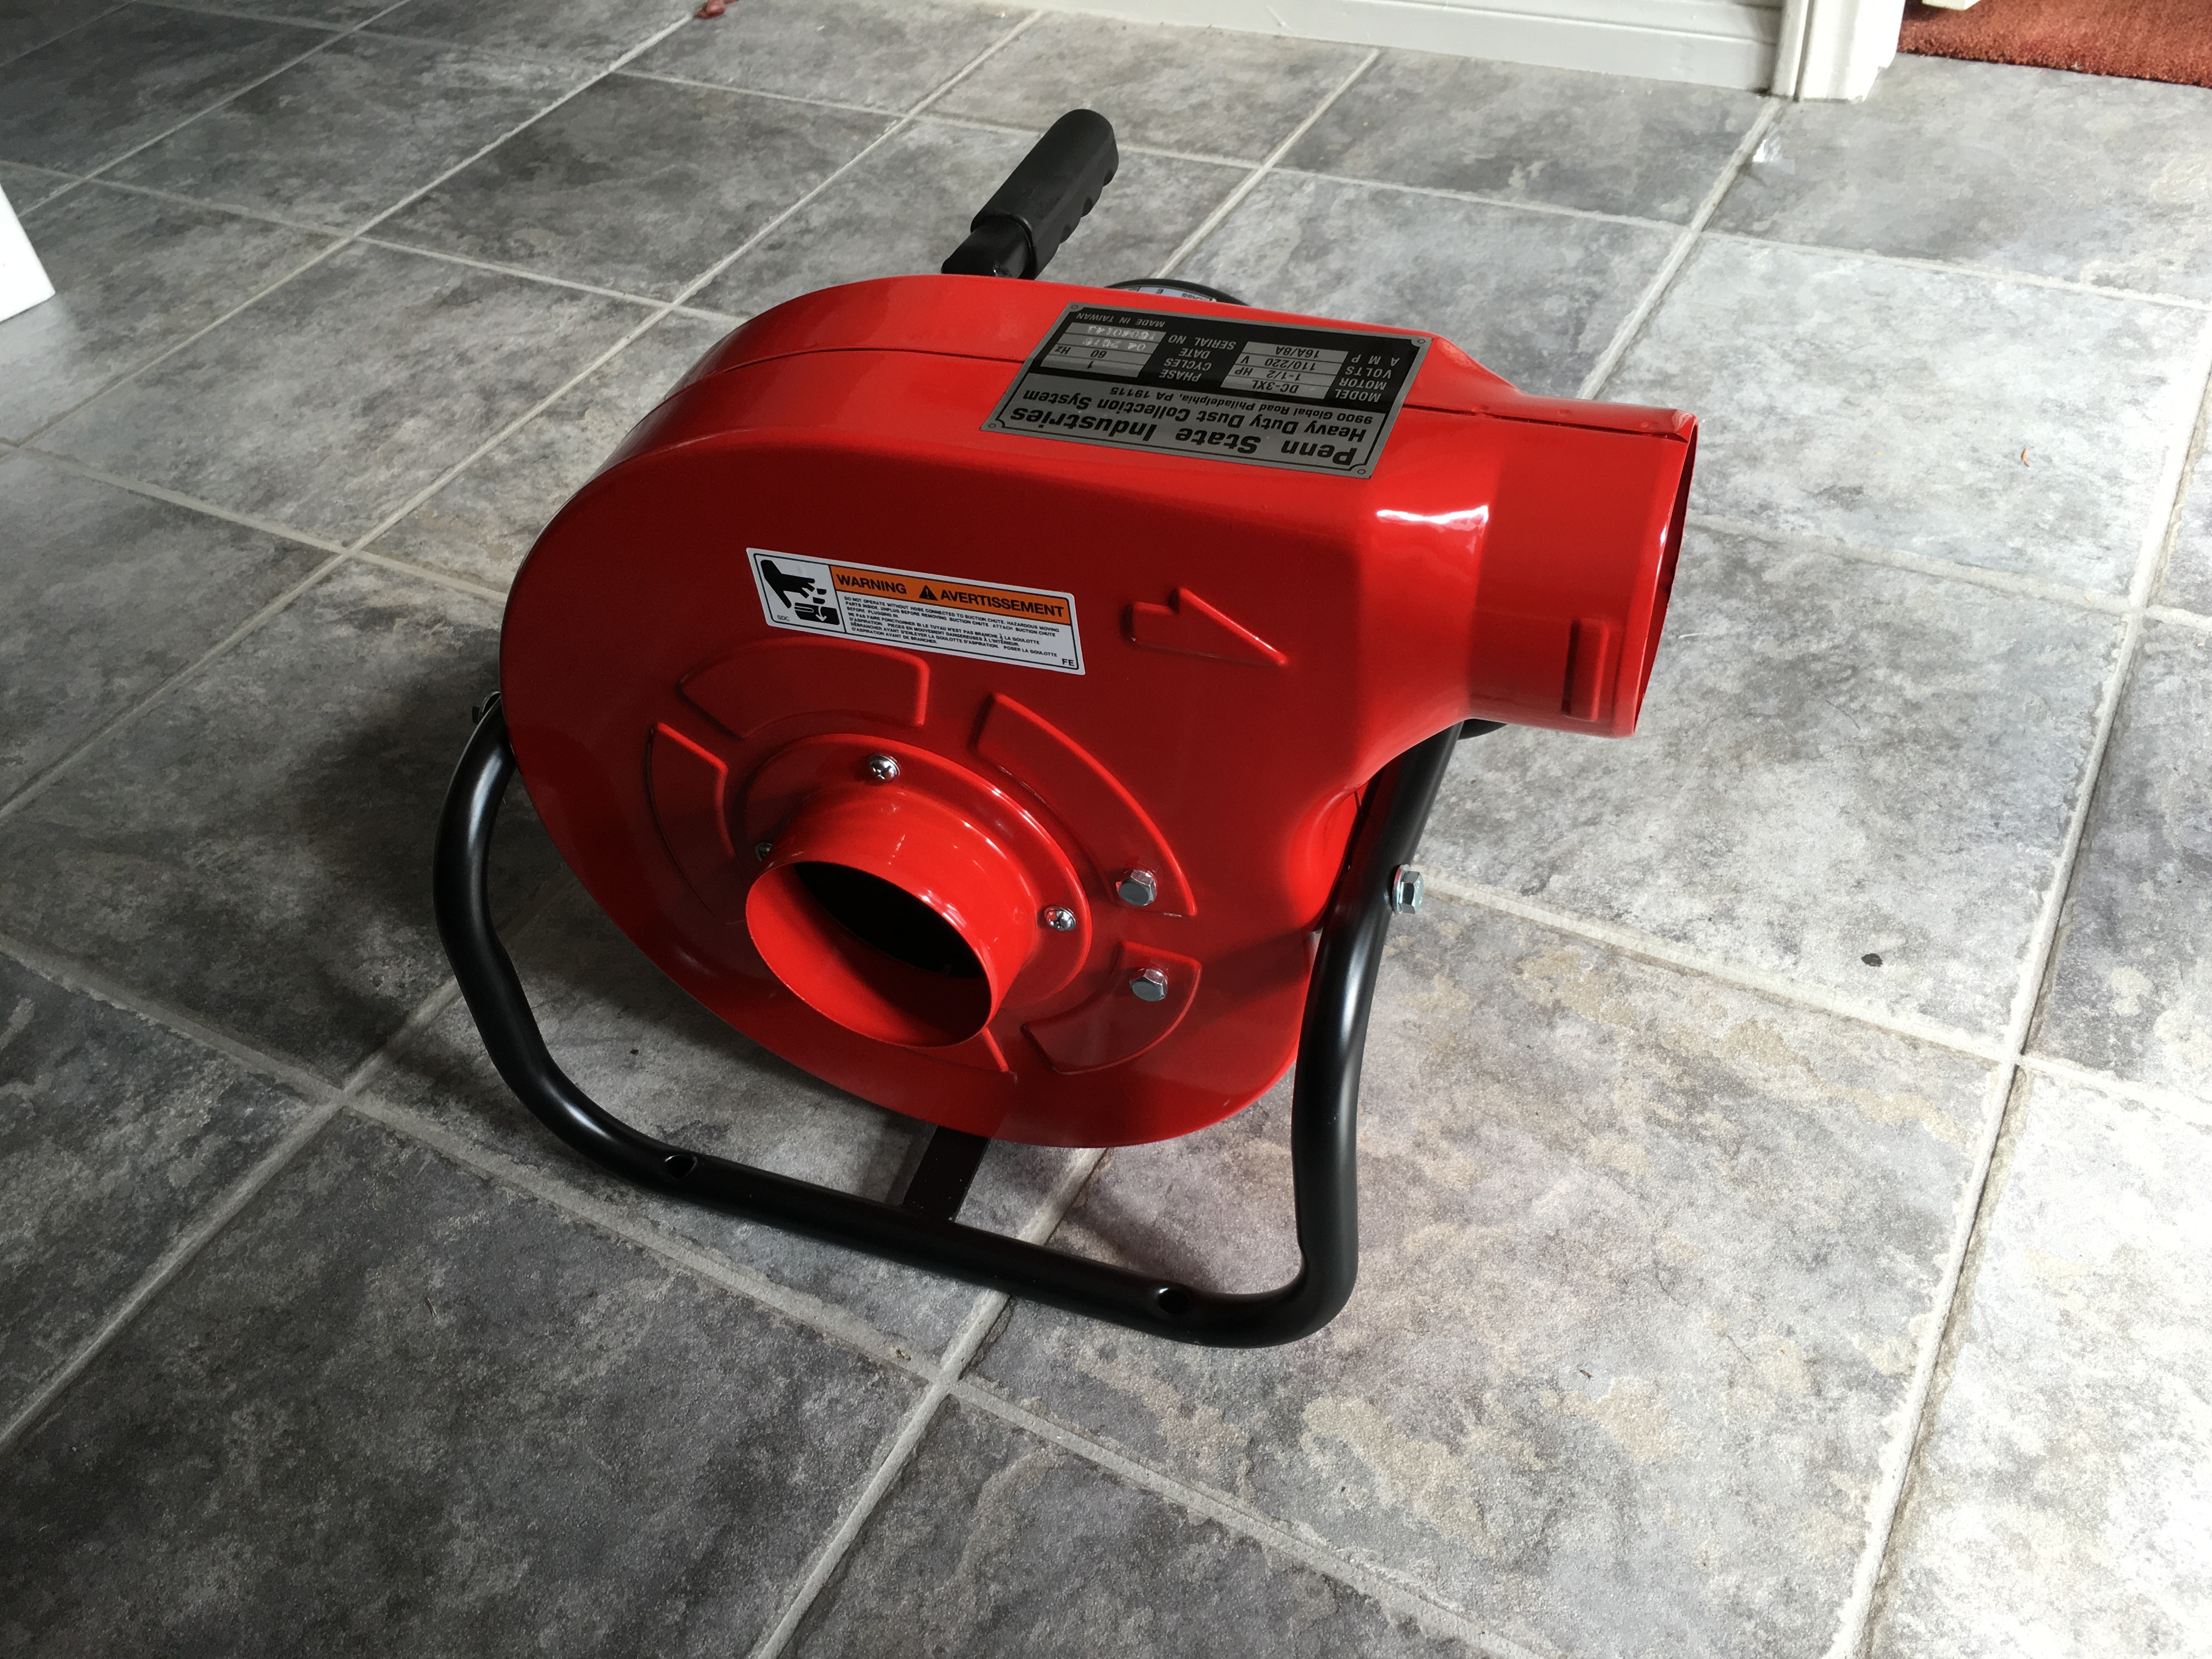
Once the old blower was out of the system, the problem became apparent: the intake of the fan was almost totally clogged up with soot from all the smoke we’ve generated over the last two years.
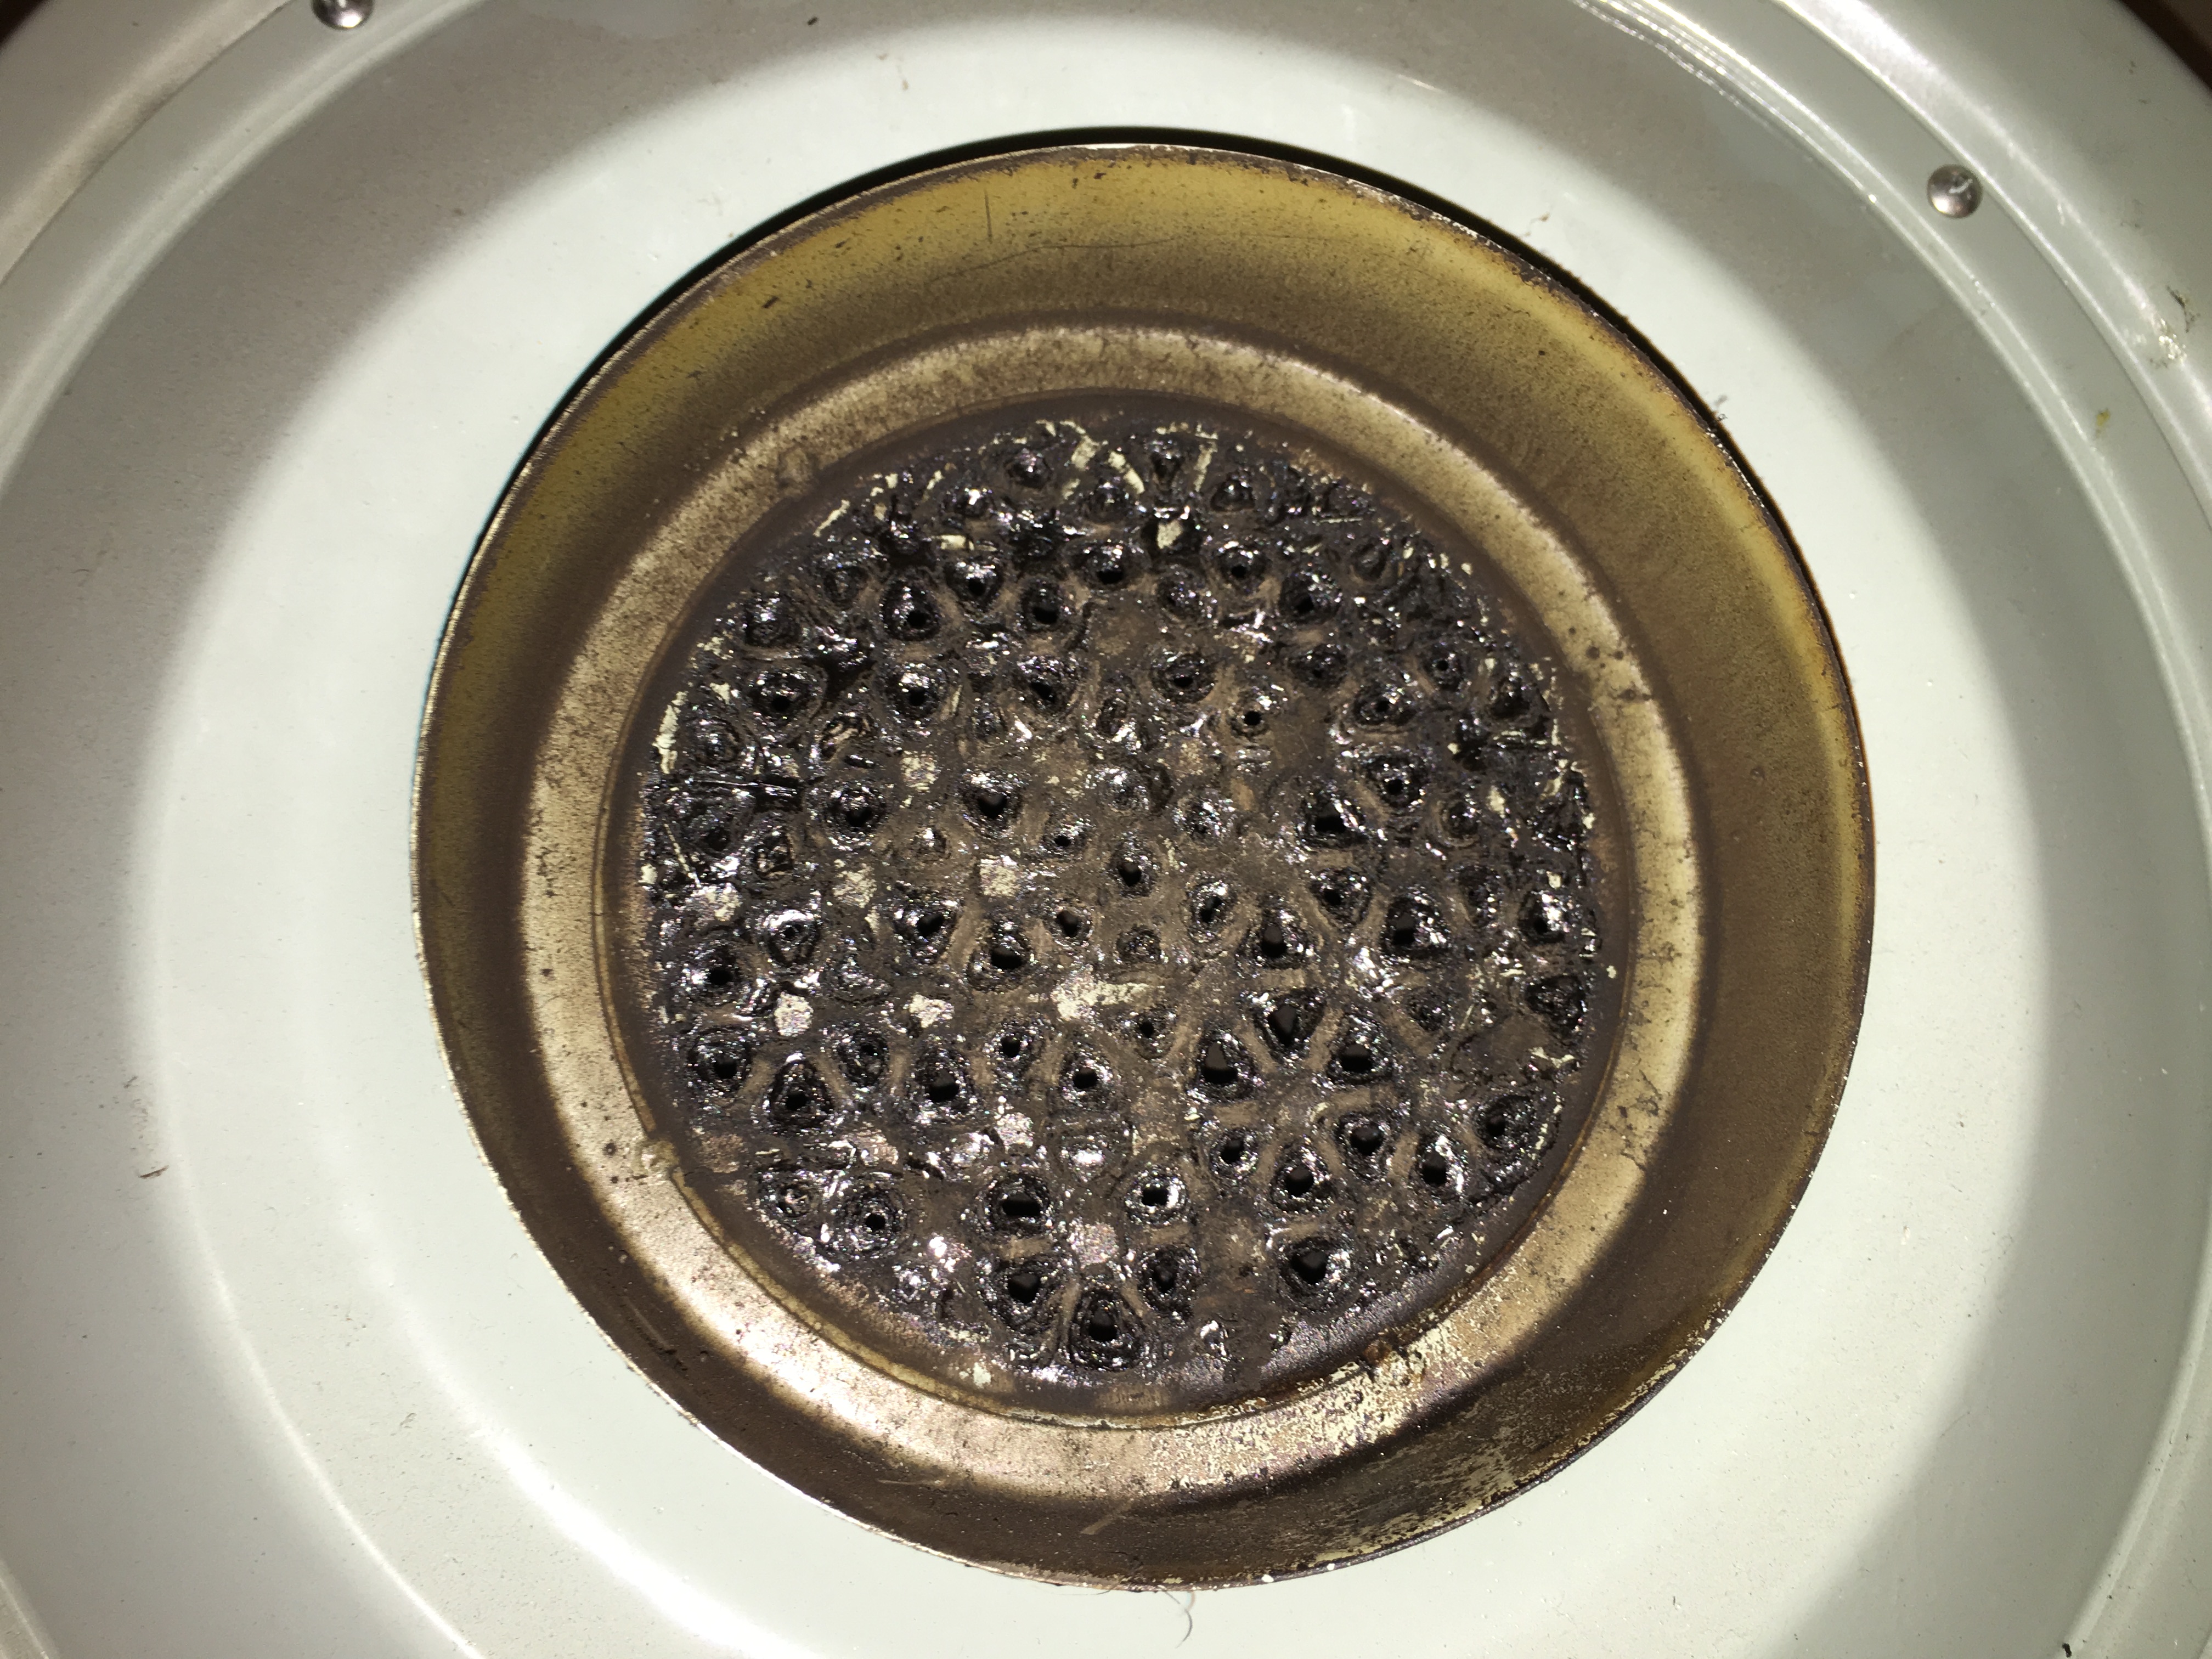
With a half a gallon of Krud Kutter, I was able to clean off the bulk of the soot and verify that the old blower still works fine. So now we have a backup blower in reserve, and we know that cleaning the blower is a regular maintenance item we need to take care of.
I’m told that Microsoft saw fit to unilaterally “upgrade” our laser’s computer to Windows 10 the other day, despite my efforts to disable the automatic update. Oh, well.
Full Spectrum Laser doesn’t seem to have a position on whether their software, Retina Engrave 3D, will work on Windows 10. I don’t know any particular reason why it wouldn’t, but I have a strong belief that if you haven’t tested something, it probably doesn’t work.
I will do some rudimentary testing soon and add a comment to this post with the results. If it seems to work, I’ll leave it on Windows 10, since the upgrade would seem to be inevitable. If I find any problems, I can theoretically still back down to the older Windows version we were running before.
Replacing the two thermistor surge suppressors in the high voltage power supply seems to have cured the laser of its problems. Hurray! It’s actually cutting a bit better than it has been doing recently.
Total parts cost: $6.66, plus shipping. Not bad!
Laser classes on April 3 and April 10 will go ahead as scheduled. A new class or two will be scheduled soon, with people from the canceled March 26 class having first shot.
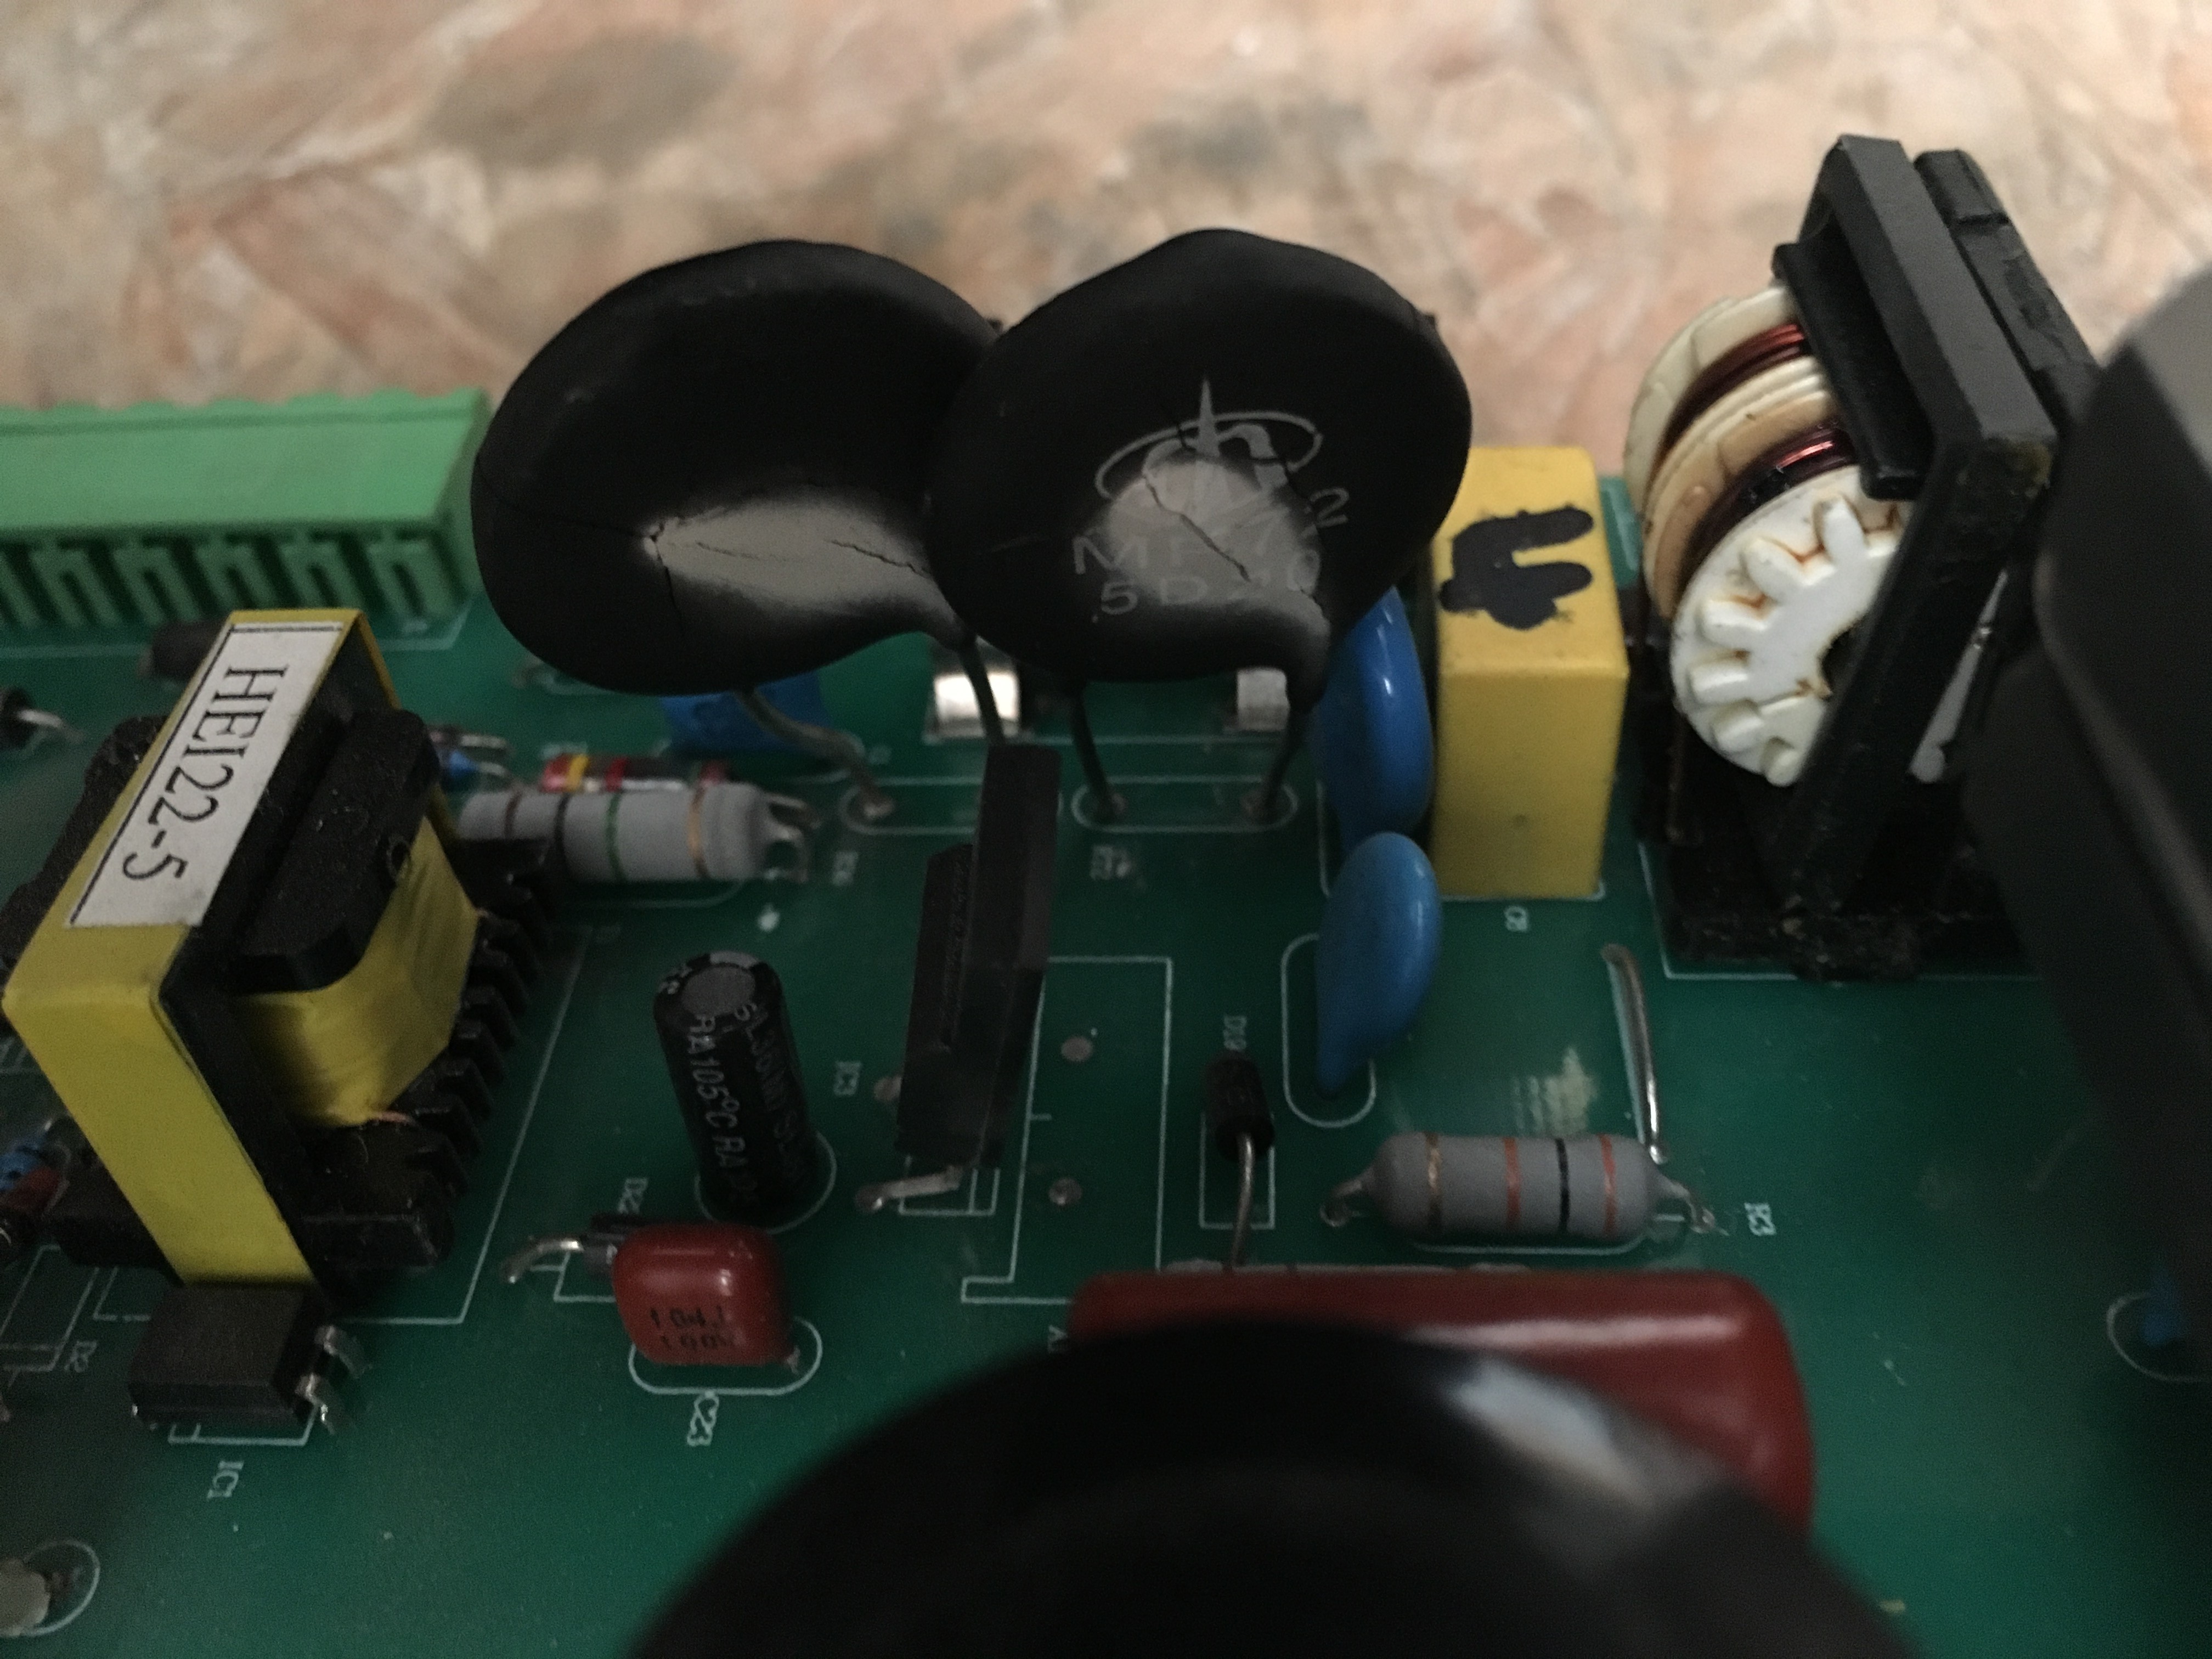
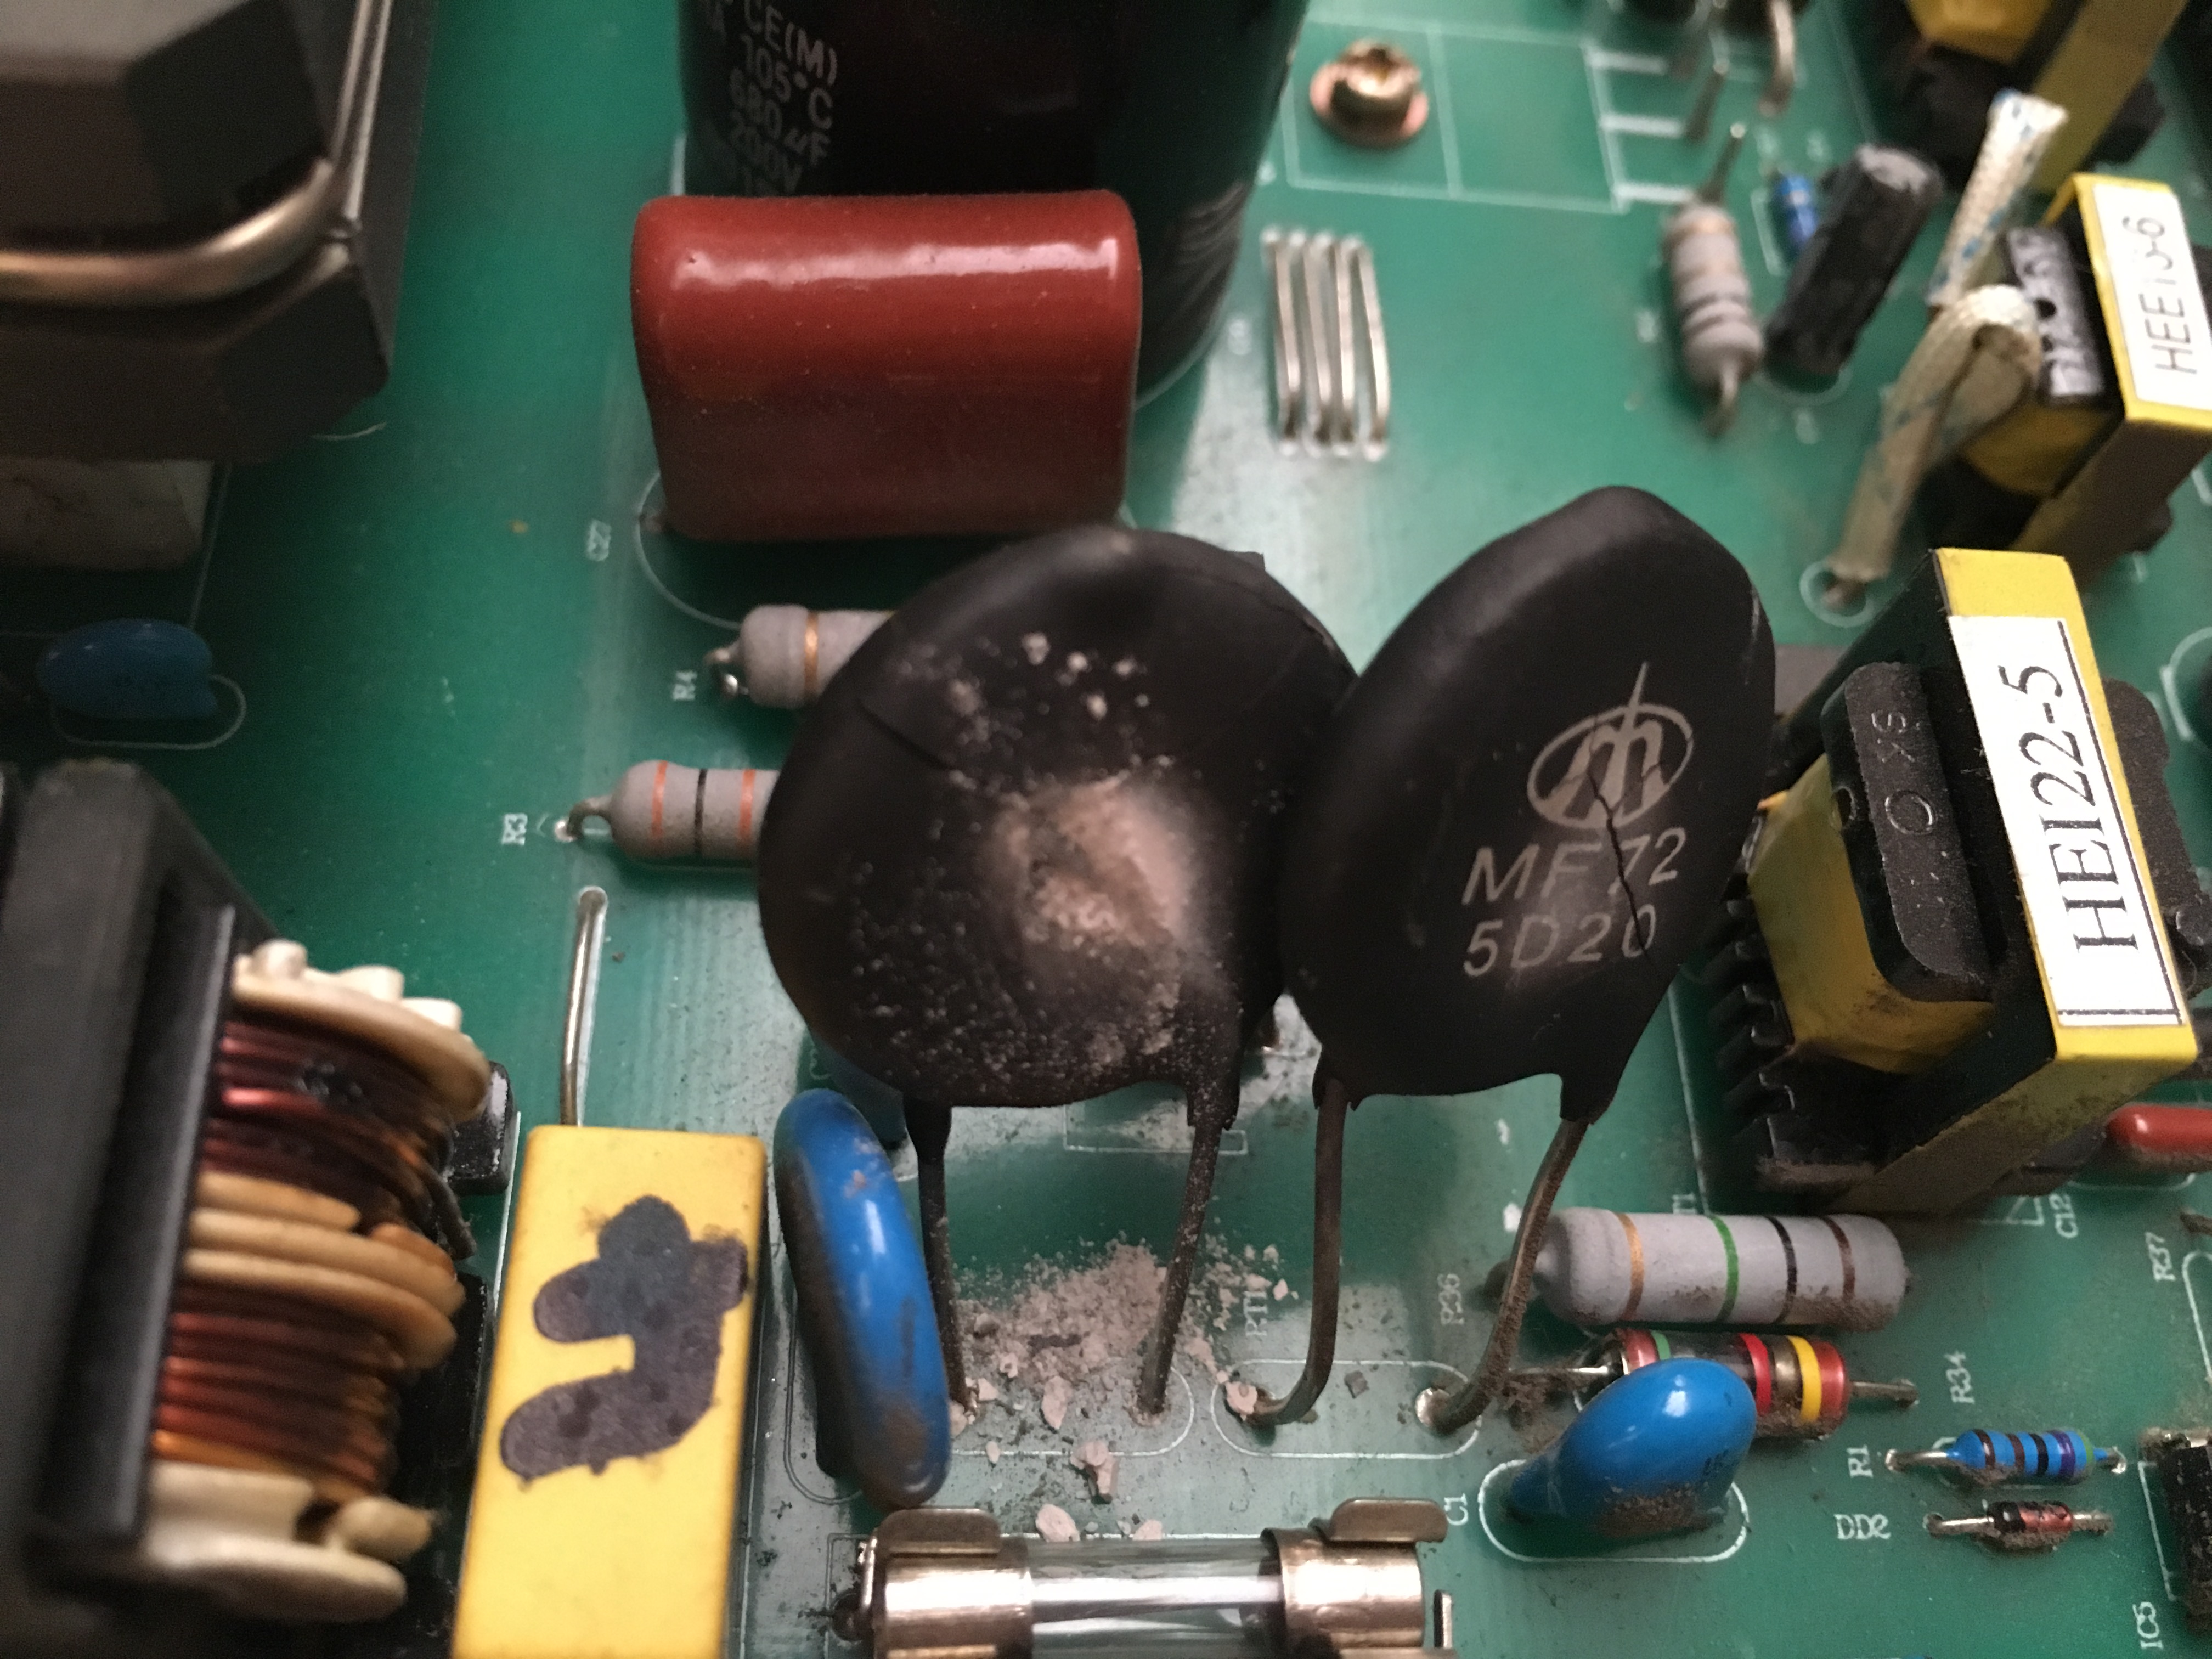
After a couple of rounds of back and forth with tech support, they had me open up the high voltage power supply and inspect for visible damage. Somewhat to my surprise, I found some. These two big black ceramic disks are clearly blown up. By the part number MF72-5D20 these are power NTC thermistors used as surge protection. According to tech support, this type of failure is usually caused by a random power surge.
I have replacement parts on order (they’re cheap) and will try simply swapping out the thermistors as soon as they come in. If that doesn’t solve the problem I will probably have to send the power supply in for repair ($100 plus shipping and handling). Cost-wise, this could have been a lot worse.
The laser is currently not working at all. The laser tube just won’t fire. I strongly suspect a failed high voltage power supply. I have a support ticket open with Full Spectrum Laser and expect to hear back by Monday. If I’m right about the problem, the downtime will depend on whether they have a replacement power supply in stock.
The laser class for Saturday, March 26 (later today) is CANCELED. We can’t have a laser class without a working laser. The classes for April 3 and April 10 are still on, for the time being, but are at risk of being canceled if I’m not able to get the laser repaired in time.