With the exhaust blower installed and ducted, and wired up enough to be used, the laser is now capable of doing work! I successfully ran vector engraving and cutting jobs on paper, thin plywood, and corrugated cardboard.
Running at full power seems to be more than our existing circuit breaker can handle. The circuit is wired for 20A but only has a 15A breaker, so there’s reason to hope that a simple breaker upgrade will solve the problem. If not, we’ll need to do more wiring work.
I’m waiting for word from the manufacturer on how best to level the Z table, which is far enough out of level to cause problems for large jobs.
-

-
First vector cutting test of the laser! Here we’re using very low power to barely mark some plain paper. The design is the “dazzler” LED light fixture from Caroushell (2012), which is in turn based on the sun design from Quemaduras del Sol (2011).
-

-
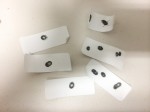
Same design, with the light fixture details deleted, cut out of plain paper.
-
-
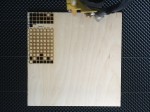
The laser software provides a quick way to run multiple vector tests to try out different power and speed settings. At the top, the first three-plus rows are a first attempt. All had plenty of cutting power to penetrate the thin plywood, but the circuit breaker popped early in the fourth row, ending the test. Below is a completed test at much lower power; it was only able to penetrate the plywood at some of the highest power settings.
-
-
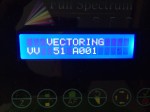
This is what the LCD display on the laser says when it’s vector cutting.
-
-
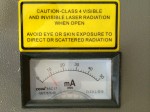
The milliammeter registers how much current is being fed to the laser during a job.
-

-
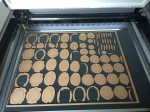
This is the first large job. It’s the turtle design from Caroushell (2012). Each shape is a slice of the 3D turtle. They’re numbered (by vector engraving) and cut out (vector cutting) of 1/16″ corrugated cardboard from the art store.
-
-
The turtle pieces after the waste material has been removed. Every piece cut out cleanly!
-

-
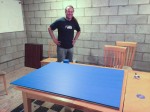
This is the Quemaduras del Sol (2011) design, complete with the yin/yang cutouts, at a five inch diameter scale, cut out of thin plywood.
-
-
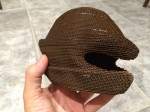
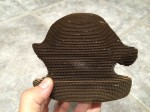
Here’s the one-eighth scale turtle model after all 66 of the slices are glued together in alignment.
-

-
This view of the top of the turtle shows the stair stepping due to the thickness of the material. On the original full-size sculpture made of 1/2″ plywood slices, we smoothed the surface with a grinder.
-
-
The corrugated cardboard is all oriented in the same direction, so you can see some light coming through the corrugations.