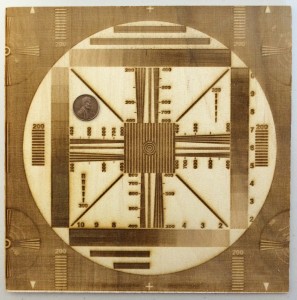
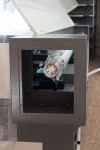
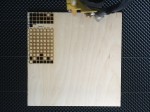
This 8×8-inch square of plywood was engraved at medium resolution, 529.2×529.2dpi. The original image was a grayscale and resolution test image intended for photography, and it was dithered by the built-in “simple dither” operation. The results are decent, but it took over an hour to engrave. That’s a lot slower than I expected. This machine seems to be quite a bit slower at rastering than the Hurricane laser at MakerPlace.
Category Archives: Announce
Attempt to cut thick plywood
Tried to cut some half-inch and three-quarter-inch plywood. Results, not so good.

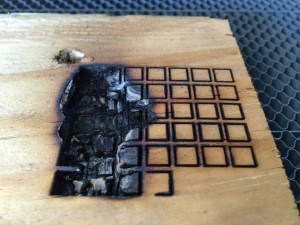
Trying to cut 3/4″ plywood from the scrap heap with the standard lens. The test matrix of squares increases power top to bottom and increases speed left to right. The slower settings set fire to everything in the vicinity, which fire was then stoked by the air assist jet. At no speed or power did it actually cut all the way through. I think the problem is depth of focus, and I have a longer focal length lens that should help somewhat.
First Jobs Run on the Laser
With the exhaust blower installed and ducted, and wired up enough to be used, the laser is now capable of doing work! I successfully ran vector engraving and cutting jobs on paper, thin plywood, and corrugated cardboard.
Running at full power seems to be more than our existing circuit breaker can handle. The circuit is wired for 20A but only has a 15A breaker, so there’s reason to hope that a simple breaker upgrade will solve the problem. If not, we’ll need to do more wiring work.
I’m waiting for word from the manufacturer on how best to level the Z table, which is far enough out of level to cause problems for large jobs.
- First vector cutting test of the laser! Here we’re using very low power to barely mark some plain paper. The design is the “dazzler” LED light fixture from Caroushell (2012), which is in turn based on the sun design from Quemaduras del Sol (2011).
- Same design, with the light fixture details deleted, cut out of plain paper.
- The laser software provides a quick way to run multiple vector tests to try out different power and speed settings. At the top, the first three-plus rows are a first attempt. All had plenty of cutting power to penetrate the thin plywood, but the circuit breaker popped early in the fourth row, ending the test. Below is a completed test at much lower power; it was only able to penetrate the plywood at some of the highest power settings.
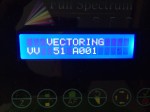
- This is what the LCD display on the laser says when it’s vector cutting.
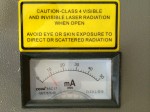
- The milliammeter registers how much current is being fed to the laser during a job.
- This is the first large job. It’s the turtle design from Caroushell (2012). Each shape is a slice of the 3D turtle. They’re numbered (by vector engraving) and cut out (vector cutting) of 1/16″ corrugated cardboard from the art store.
- The turtle pieces after the waste material has been removed. Every piece cut out cleanly!
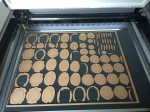
- This is the Quemaduras del Sol (2011) design, complete with the yin/yang cutouts, at a five inch diameter scale, cut out of thin plywood.
- Here’s the one-eighth scale turtle model after all 66 of the slices are glued together in alignment.
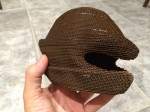
- This view of the top of the turtle shows the stair stepping due to the thickness of the material. On the original full-size sculpture made of 1/2″ plywood slices, we smoothed the surface with a grinder.
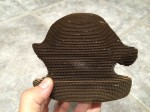
- The corrugated cardboard is all oriented in the same direction, so you can see some light coming through the corrugations.
Exhaust Ducting Installation
Today the ducting for the exhaust blower was completed and the blower was mounted in its new doghouse on the roof of Colab. Thanks Natural and Joe!
- Joe installing the new ductwork. It comes through the wall right behind the laser chassis, and goes up to meet an existing vent in the roof.
- Flexible metal ducting connects the wall penetration to the laser chassis, allowing the laser to be pushed up almost against the wall, or pulled out two feet for service. You can also see the cooling water lines (white) and ethernet cable (yellow).
The Laser Lases!
Progress on laser setup. Friday I got the water chiller connected (with new, longer water hoses and signal cable), which meant I could safely power on the laser and do some tests and initial alignment. So far, so good. Also got the computer hooked up to the laser (with a new, longer Ethernet cable) and the air assist compressor connected. Main things still to set up: the exhaust blower and the air conditioner.
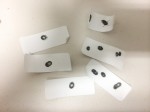
- The first 5 millisecond test pulse from the laser, shown as a dark spot on a thermal printer sticker. This confirms that the tube survived shipment and installation!
- First launch of the RetinaEngrave3D software with the laser actually connected. It phones home and validates the software license for the controller card.
- Some of the test dots fired during initial alignment. The alignment procedure was completed but the results still need to be confirmed.
Laser Futzing Day
A bit more progress to report. The dedicated computer is installed. I did an inspection of all the laser’s components and planned out the rest of the tasks for hook-up. I want to put the water chiller near the far wall, to keep it away from you when you’re working at the computer. Unfortunately, all the hookups for the chiller (water hose in, water hose out, and a status signal cable) are on the left side of the laser chassis, and the provided hoses and cable are not long enough to reach to the right side. I’ll have to make longer ones.
- The laser’s dedicated computer is now set up in the lab. And that new box on the right? That’s an air conditioner for the lab!
- The blue box is the high voltage power supply that makes the laser lase.
- This section contains the driver modules for the mechanical positioners. The larger one at the top is the Z axis, which raises and lowers the whole work table beneath the fixed laser. The other two drive the X and Y position of the laser head.
- At the top is a filter that isolates the high voltage power supply from the rest of the electronics. Below are three other power supplies for various purposes.
- This is the RetinaEngrave3D controller board by Full Spectrum Laser. It’s the brains of the laser. The blue cable on the left is Ethernet to the external computer, and the black cable is USB (probably just for the 5V DC power). The other connectors handle all the other devices in the laser chassis.
Laser Tube Installed
Today the laser tube was unboxed and mounted into the main chassis. Progress!
- The laser tube out of its box at last.
- Paul mounts the chassis extender needed to fit the extra-large 150 watt laser tube into the already-huge chassis.
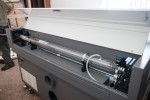
- The laser tube unwrapped. The beam comes out the right end. The innermost tube is the laser. The surrounding tube and spirals is the water cooling system. The outer tube is just for support and protection, as far as I know.
- The high voltage end of the tube, surrounded by the chassis extender (with the lid off). The high voltage wire hasn’t been hooked up yet. There is a cylindrical plastic shield to guard the high voltage end.
- The tube mounted in the chassis. The big white tubes are water in (on the left) and out (on the right). The high voltage wire still isn’t hooked up.
- The beam output end of the laser tube shines through a beam combiner (greenish gold circle) and is then reflected toward the front of the machine by the diagonal mirror (at right). The third thing (mounted on two black plates with two spring-loaded brass screws) is an ordinary red laser pointer, which is combined with the invisible main beam so you can see where it hits the work surface.
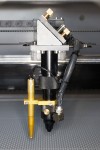
- The laser cutter head. The beam comes in from the left near the top and is reflected downward by the diagonal mirror. Lower in the vertical black tube is the lens, made of a special material that’s transparent to infrared light. The black rubber hose on the right delivers compressed air, which sprays out the black nozzle at the bottom, along with the laser beam. The golden contraption on the left is a mechanical height probe for autofocus.
Wall Rebuilt
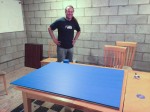
The end wall of the upstairs laser lab has now been rebuilt, thanks to Natural. The wall now features a large window, so the laser user can look out into the main build area and won’t feel quite so isolated.
Immediately beneath the window, there’s an open area in the framing. This potential opening lines up with the side door on the laser chassis, which can be opened to feed long stock through the machine.
Laser Forklifted Into Place
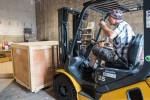
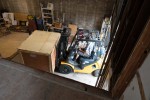
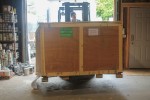
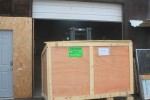
The laser was forklifted up from ground level into the laser lab today! Thanks to Yeti for driving the forklift and to Jon Ray for arranging everything.
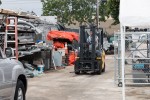
- Rented forklift and volunteer driver Yeti enter the Colab facility.
- Yeti pilots the forklift. (photo by Meg)
- Squeezing in past the Youtopia trailer.
- Gauging the length and positioning of the forks.
- First attempt to pick up the laser. It wasn’t quite right.
- Finding a better configuration of the forks to pick up the laser.
- Second and final lifting of the laser!
- View of the lift from in the laser lab.
- Backing out onto the driveway to get a better angle on the target. (photo by Meg)
- Backing back into the building after turning around. (photo by Meg)
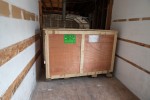
- The crate protecting the laser was only vaguely tacked together after initial inspection. The sides are still attached, but just barely.
- The laser rises!
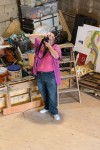
- Meg taking a picture of Paul taking a picture of Meg …
- Paul is up in the laser lab acting as spotter (and photographer). (photo by Meg)
- Eyeballing the angle, getting ready to lift. (photo by Meg)
- Getting close to the right approach. (photo by Meg)
- Here it comes!
- Squeezing into the room.
- Easing the laser into place! (photo by Meg)
- Retrieving the fork extender that didn’t come out with the lift.
- There it is!
- Sides and top removed from the crate. This is the back of the machine. You can see the big exhaust fan port in the center. The tiny gold ports with yellow labels are cooling water in and out, and compressed air in. To the right of that is a connector for monitoring the status of the water chiller.
- LNT: debris from crate demolition.
- The laser in (more or less) its final position in the laser lab!